Gravel Biking for Beginners: The Complete 2026 Guide
Gravel biking opens up roads and terrain that road cyclists can't reach and mountain bikers would find too easy. This complete beginner's guide covers everything — from choosing your first gravel bike and setting up tubeless tires, to riding skills on loose surfaces, route planning tools, and what to carry for backcountry rides.
In This Guide
What Is Gravel Biking?
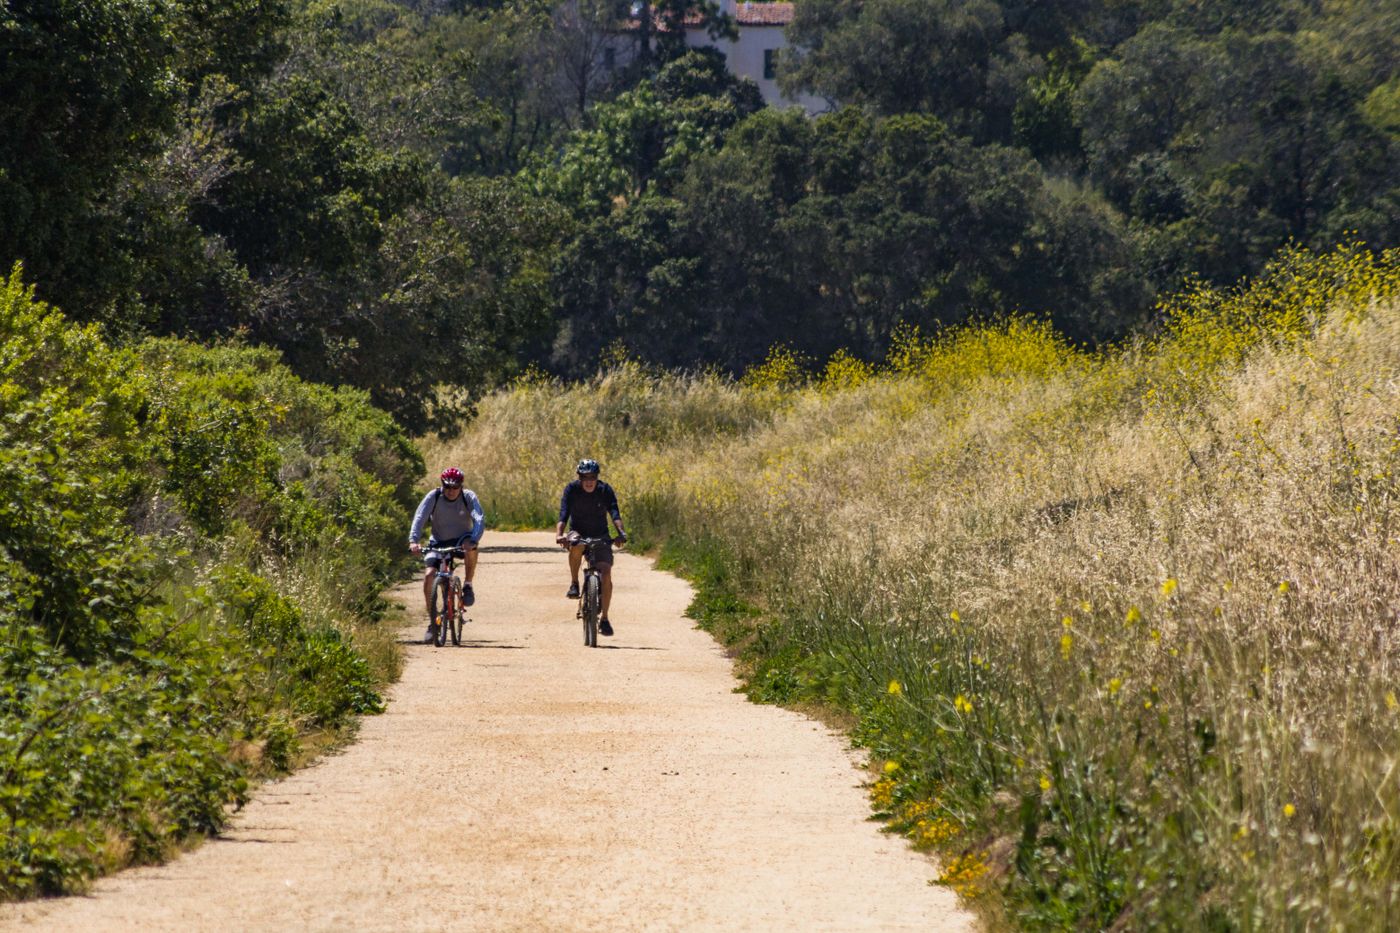
Gravel biking sits at the intersection of road cycling and mountain biking — it uses a bike that's more capable than a road bike on unpaved terrain but more efficient on pavement than a mountain bike. The defining feature is the surface: gravel bikers ride dirt roads, fire roads, double-track trails, rail trails, and mixed pavement-to-gravel routes that pure road bikes can't handle and mountain bikes would find too easy.
The appeal is access. Gravel roads and dirt tracks cover far more of the country than paved bike paths. A gravel bike opens up routes that road cyclists can't reach — quiet forest service roads, farm tracks, cross-country touring routes, and backcountry exploration. Gravel biking has exploded in the past decade because it solves the core frustration of road cyclists: traffic, distracted drivers, and the sense that paved roads are deteriorating anyway.
Key Insight: You don't need a dedicated gravel bike to start — a hybrid bike with 700x35c or larger tires can ride most beginner gravel routes. Buy the dedicated gravel bike after you've confirmed you love the riding style.
Gravel events like Unbound Gravel (200 miles of Kansas dirt), Dirty Kanza, and thousands of regional gravel races have created a competitive culture alongside the recreational community. But most gravel riders aren't racing — they're exploring routes that aren't accessible by any other means, at their own pace, often loaded with camping gear for bikepacking.
Choosing Your First Gravel Bike
Frame Material
Most beginner gravel bikes use aluminum frames ($800-1,500) — durable, lighter than steel, and significantly cheaper than carbon. Aluminum rides stiffer than carbon or steel, transmitting more road vibration, but modern aluminum gravel bikes with wide tires and compliant seatposts mitigate this considerably. Carbon fiber ($2,000+) saves weight and improves ride quality but adds cost. Steel is a third option — heavier than aluminum but provides a smoother ride and is repairable virtually anywhere in the world.
Tire Clearance
The most important spec on a gravel bike is maximum tire clearance. More clearance = ability to run wider tires = more grip, comfort, and capability on loose surfaces. A true gravel bike should clear at least 40mm tires; better bikes clear 45-50mm. A road bike that "accepts 32mm tires" is not a gravel bike — it's a road bike with slightly more tire clearance. Run the widest tire that fits your frame for most gravel riding.
Drivetrain
Modern gravel bikes typically use a 1x drivetrain (single chainring) — simpler, lighter, and adequate for most terrain. SRAM's Apex 1x and Force 1x or Shimano's GRX 1x are the most common options. Some bikes still use 2x (two chainrings) for maximum gear range on steep terrain or long loaded rides. For beginners, 1x is simpler and lower maintenance — fewer things to adjust and no front derailleur to trim.
Budget Tiers
| Budget | What You Get | Good For |
|---|---|---|
| $700-1,000 | Entry aluminum, mechanical shifting, basic components | Trying gravel before committing |
| $1,000-1,800 | Quality aluminum, Shimano GRX or SRAM Apex, hydraulic brakes | Regular gravel riding |
| $1,800-3,000 | Premium aluminum or entry carbon, GRX 810 or Force 1x, high-end wheels | Enthusiast riding, events |
| $3,000+ | Full carbon, top-tier groupset, performance wheels | Racing, high-performance touring |
Bike Fit & Setup for Gravel
Gravel Fit vs. Road Fit
Gravel riding requires a slightly more upright position than pure road cycling. You'll spend hours on loose terrain that demands constant micro-adjustments — a more relaxed back angle reduces fatigue and gives better bike control. When test-riding gravel bikes, look for a position that feels comfortable without being too upright (which sacrifices power). Most dedicated gravel bikes have a slacker head tube angle and longer wheelbase than road bikes for stability on loose terrain.
Saddle Height and Position
The classic rule: with the heel on the pedal at bottom stroke, the knee should be almost fully extended. Move the saddle forward or back until your knee is directly over the pedal spindle at the 3 o'clock position with the ball of your foot. Saddle tilt: flat to slightly nose-down for long-distance comfort. Wide gravel saddles (140-145mm) tend to suit riders better than narrow road saddles for the varied positions demanded by off-road terrain.
Tire Pressure for Gravel
This is the single biggest setup factor beginners get wrong. Road cycling instinct says high pressure = fast. On gravel, the opposite is often true. Lower pressure (20-35 PSI depending on tire width and rider weight) allows the tire to deform around rocks and roots, increasing grip and reducing rolling resistance on loose surfaces. Higher pressure causes the tire to skip off obstacles rather than absorb them. Start with body weight in kg divided by 5 as a starting PSI, then adjust based on feel and puncture rate.
Essential Gravel Riding Gear
Helmet
A road helmet works for gravel, but look for one with MIPS (rotational impact protection) and decent ventilation. Gravel-specific helmets often have visors (shields eyes from sun, branches, and roost from other riders) and slightly more coverage at the back. MIPS helmets are strongly recommended for any off-road riding.
Gravel-Specific Clothing
Standard road cycling kits work on gravel, but dedicated gravel apparel adds durability and function. Gravel bibs have thicker chamois for longer rides on varied terrain. Gravel jerseys often have larger pockets and tougher fabric. Cargo bib shorts add a large thigh pocket for trail snacks and phone — remarkably useful for all-day rides.
Shoes and Pedals
Dedicated gravel shoes (Shimano GRX RX801, Giro Empire VR90) use SPD 2-bolt cleats that recess into the sole — essential for hike-a-bike sections where you need to walk. Road 3-bolt cleats are impractical for any off-bike walking. If you're new to clipless pedals entirely, SPD pedals are the best system to learn on — they clip in easily, release reliably, and work with walkable shoes.
Navigation
A Garmin Edge GPS computer is the gravel rider's navigation tool. Download routes from Komoot or Ridewithgps before rides — cell service is unreliable on backcountry routes. The Garmin Edge 530 ($300) or Edge 540 ($350) handles offline navigation, route alerts for turns, and heart rate monitoring. A phone-mount alternative works if you have good offline map downloads, but GPS computers have better battery life and visibility in bright sunlight.
Riding Skills for Gravel
Loose Surface Cornering
The biggest adjustment from road to gravel is cornering. On loose gravel, the front wheel can wash out mid-corner — the opposite of pavement where you can rail corners aggressively. Gravel corners require: entering wide, slowing before the apex rather than during it, weighting the outside pedal, looking through the corner to the exit. Brake on the straight sections, not mid-corner. Practice on low-speed gravel corners before committing to fast descents.
Descending
Loose descents are the highest-risk moment in gravel riding. Increase speed gradually — don't bomb a new descent until you know the surface and grade. Keep your weight back (move your seat back and lower your center of gravity). Use both brakes evenly — front-only braking on loose gravel causes washouts; rear-only braking causes the rear to skid and drift. Feather both brakes to control speed without losing traction.
Climbing in Loose Conditions
Steep gravel climbs require seated climbing — standing shifts weight to the front wheel, which digs in, while the rear wheel loses traction and spins. Shift to an easier gear before the climb, maintain consistent cadence, and stay seated longer than you would on pavement. If the rear wheel spins, shift body weight back subtly without lifting out of the saddle.
Route Planning & Navigation
Finding Gravel Routes
Komoot is the best route-planning tool for gravel — it has a massive database of user-generated routes, shows surface type (paved, gravel, dirt, rough), and allows filtering by difficulty and surface type. Ridewithgps is the alternative, particularly popular in the U.S. racing community. Strava heatmaps show where other cyclists ride, which is a reliable indicator of rideable surface. Always cross-reference planned routes with satellite imagery (Google Maps satellite view) to verify the surface before committing.
Understanding Route Difficulty
Gravel route difficulty depends on elevation gain, surface condition (packed gravel vs. loose chunky rock vs. sandy singletrack), and route length. A 40-mile flat gravel ride is beginner-appropriate. A 40-mile route with 4,000 feet of climbing on loose rock is intermediate-advanced. Start with well-traveled, well-rated routes before adventuring on lightly-used tracks. Cell service is unreliable on many gravel routes — download offline maps before leaving.
Nutrition & Hydration for Gravel
Gravel rides often last 3-6 hours and cover terrain with no support. Nutrition planning matters in a way it doesn't for an hour road ride. The cycling nutrition rule: eat before you're hungry, drink before you're thirsty. For rides over 90 minutes, consume 30-60g of carbohydrates per hour — sports gels, energy bars, bananas, or real food depending on preference.
Hydration: 16-24 oz per hour depending on temperature and intensity. Most gravel bikes have mounts for two water bottles — carry both. For rides over 3 hours in remote areas, carry a water filter (Sawyer Squeeze) and know your water source options. Running out of water on a 4-hour backcountry ride is a serious situation.
Gravel Nutrition Rule: Carry 25% more food and water than you think you need. Remote routes take longer than planned, detours happen, and bonking (running out of energy) on a remote dirt road is a miserable experience with no quick fix.
Field Repair & Maintenance
The Essential Gravel Repair Kit
- Tubeless plugs (Dynaplug or similar): Fixes the vast majority of punctures in seconds without removing the wheel
- CO2 inflators (2) + hand pump: CO2 for fast inflation after a plug or tube change; hand pump as backup
- Spare inner tube (1-2): Backup if a tubeless repair fails
- Tire levers (2): For mounting tires
- Multi-tool: Allen keys (2.5, 3, 4, 5, 6mm), torx, flathead, chain breaker
- Quick-link (chain link): Repairs a broken chain
- Zip ties (4-6): Fixes almost anything temporarily
Tubeless Setup
Most quality gravel bikes come tubeless-ready — meaning the rims and tires seal with sealant (Stan's NoTubes is standard) without inner tubes. Tubeless eliminates 90% of punctures: small holes seal automatically with the latex sealant. Setting up tubeless requires: tubeless-ready rim and tire, tubeless valve stems, and 2-3 oz of sealant per tire. Refresh sealant every 3-6 months as it dries. The performance advantage (lower rolling resistance, lower pressure without pinch flats) makes tubeless the standard setup for serious gravel riding.
Our Top Gravel Bike Picks
Trek Checkpoint AL 5
Aluminum frame, Shimano GRX 1x11, hydraulic disc brakes, 45mm tire clearance. The most complete beginner-to-intermediate gravel bike package at $1,699.
Check Price on AmazonMarin Gestalt 1
Series 3 aluminum, 2x9 Shimano Sora, mechanical disc brakes, 40mm tire clearance. The best entry into gravel biking at $899-999 for riders not ready to commit to a $1,500+ investment.
Check Price on AmazonSpecialized Diverge E5
E5 aluminum, Shimano GRX 1x11, hydraulic brakes, Future Shock 2.0 front suspension, 47mm clearance. The suspension-equipped gravel bike for riders who want both performance and rough terrain comfort.
Check Price on AmazonFrequently Asked Questions
Can I start gravel biking on my current road bike?
If your road bike accepts 32mm+ tires, you can start gravel biking immediately. Many riders begin on hybrid bikes or road bikes with wider tires and only invest in a dedicated gravel bike after confirming they love the riding style. A 28mm tire road bike on hardpacked gravel fire roads works fine; loose chunky gravel or sandy tracks require wider rubber and a more capable geometry.
What's the difference between a gravel bike and a cyclocross bike?
Cyclocross bikes are designed for short, intense race circuits — they have aggressive geometry, limited tire clearance (usually max 40mm), and are optimized for repeated dismounts and remounts. Gravel bikes have more relaxed geometry for all-day comfort, larger tire clearance (up to 50mm), more mounting points for cargo, and often longer wheelbases for stability. A cyclocross bike can ride gravel; a gravel bike is a better all-day tool for most riders.
How fit do I need to be to start gravel biking?
Gravel biking is accessible to any cyclist — routes range from flat 15-mile fire road rides to 200-mile mountain epics. Start with shorter, easier routes and build distance and elevation gradually. If you can comfortably ride 20 miles on pavement, you can ride your first 15-mile gravel route. The fitness builds quickly — gravel terrain demands more from your body than equivalent paved distance, so gains come faster than flat road riding.
Is gravel biking safe?
Gravel biking carries more risk than flat pavement road cycling but less than technical mountain biking. Falls are more likely on loose terrain than pavement; speeds are generally lower than road racing; traffic is generally absent (which is a major safety advantage). Wear a helmet (MIPS), carry a charged phone, tell someone your route, and start on beginner-friendly routes with good surface quality. A first-aid kit and adequate food and water are essential for remote backcountry routes.
As an Amazon Associate we earn from qualifying purchases. Prices accurate at time of publishing.